
How to Install Gutter Guard (and When to Call a Pro)
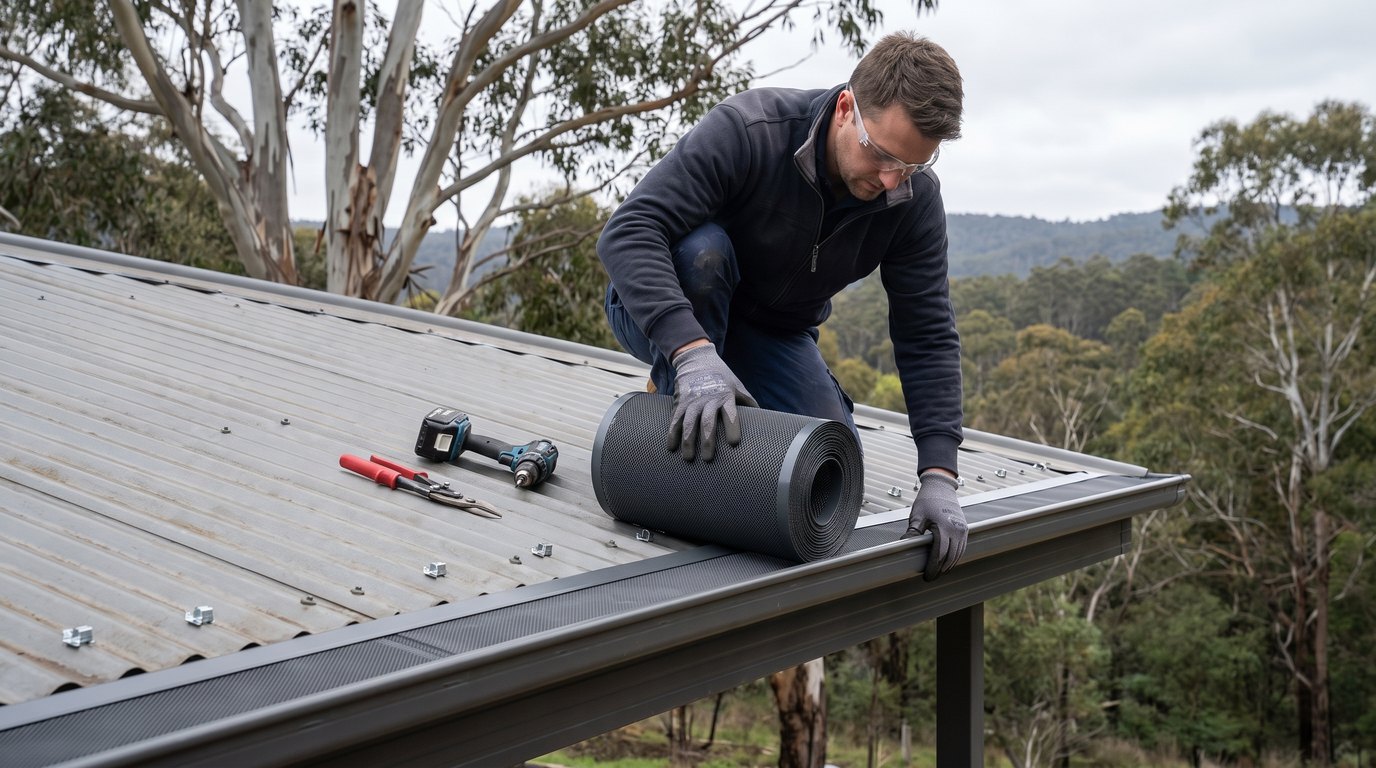
Cleaning gutters two or three times a year gets old fast, especially when the gums keep dropping leaves and bark no matter what season it is. Gutter guard is the obvious fix, and plenty of Hobart homeowners look at a DIY kit and think, how hard can it be?
On a single-storey house with straight runs and safe ladder access, it is genuinely a weekend job. On a two-storey place in the foothills with a steep pitch and a mossy roof in July, it is a different proposition entirely.
Here is how gutter guard actually goes on, what changes between a tiled roof and a Colorbond one, and where the line sits between a sensible DIY project and a job worth handing over.
What you are actually installing
Most gutter guard sold in Australia is a roll of powder-coated aluminium mesh that sits from the front lip of the gutter back onto the roof, sealing the gutter opening while letting water through. It is not a one-size product. Kits are sold by roof profile, because the way the mesh attaches on the roof side changes completely between tile, corrugated iron, Trimdek and Klip-Lok.
There are other formats. Foam inserts drop straight into the gutter trough and brush guards sit in the channel with the bristles facing up. Both are quick to fit and cheap, but they sit inside the gutter rather than sealing it, so debris still lands in the trough. If you are still deciding between formats, our guide to the best gutter guard types compares mesh, foam and brush side by side.
This guide covers the aluminium mesh method, since that is what nearly every Australian kit uses and what most Hobart roofs need.
Measure and check before you order
Measure each straight gutter run separately, then add the runs together. Corners, valleys and returns all change what you need, so write each length down rather than guessing a total.
Gutter Guard Direct advises adding 250 to 500mm to each gutter-length measurement to allow for overlap between sections and a margin for cutting errors. That extra material costs very little and running short halfway along a run is a genuinely annoying way to lose an afternoon.
Measure from the ground where you can. It is safer, and for most single-storey homes you can get an accurate enough figure with a tape and a helper without going anywhere near the roof.
While you are looking, check the condition of what you are covering. Rust in the gutter base, sagging sections, loose brackets or a fall that lets water pool all need sorting first. Mesh does not fix drainage problems, it just makes them harder to see and harder to reach.
Tools and materials
Nothing exotic, but have it all on the ground before you climb:
- Tape measure and a marker
- Tin snips for cutting the mesh
- Cordless drill with a hex head driver
- The trims, saddles or clips and colour-matched screws supplied with your kit
- Gutter scoop, bucket and a garden hose for the pre-clean
- Gloves and safety glasses, because cut mesh edges are sharp
- A stable ladder on firm level ground, ideally with someone footing it
Step 1: Clean and flush the gutters first
Every supplier and installer agrees on this one. Scoop out the leaves, bark, twigs and grit, pay attention to corners and the downpipe outlets, then run a hose through each run.
Watch where the water goes. It should move toward the outlet and discharge freely at the bottom of the downpipe. If it pools anywhere or backs up at the outlet, deal with that before any mesh goes on. Once the guard is fitted, a blocked downpipe becomes a much bigger job to get at.
This is also the moment to check joins, end caps and the fascia for anything that needs a repair.
Step 2: Roll out and cut the mesh
Work one run at a time. Roll the mesh out along the full length of the gutter, check it reaches your fixing point on the roof side, then cut to length with the snips.
Leave the overlap you allowed for at each join. Too little and you get a gap that leaves walk straight through. Too much and you create a raised ridge along the join that catches debris and holds it there.
Wear the gloves. Freshly cut aluminium mesh has an edge on it.
Step 3: Fix the front edge to the gutter
The mesh attaches to the front lip of the gutter using the trim supplied with your kit, fastened with hex head screws. The trim spreads the load along the edge so the mesh does not tear at the fixing points and does not lift in wind.
Leaf Stopper recommends 250mm screw spacing, which its 500mm trims are cut to suit. Keep each screw firm without overtightening, because too much torque will bend thin mesh or distort the gutter lip.
Work along the run keeping the mesh under even tension. A section that sags between fixings will pond water and collect debris in the dip.
Step 4: Secure the roof side
This is where tile and metal roofs part ways.
Tiled roofs. Make relief cuts in the mesh so it can follow the contour of the tiles rather than bridging over them. Gutter Guard Direct suggests roughly three cuts per tile width. Then tuck the back edge of the mesh under the tile course above the gutter. Gutter Guard Direct and Aussie DIY Solutions both specify the second row of tiles, while Leaf Stopper's guide says the first row, so follow the instructions that came with your kit rather than assuming.
Lift tiles gently. Older terracotta and concrete tiles get brittle, and a cracked tile you did not notice becomes a roof leak you find in the next southerly.
Corrugated and metal roofs. Instead of tucking, the mesh is fastened down onto the roof profile with saddles or clips that match the corrugation shape. Gutter Guard Direct fixes saddles to every second corrugation. Trimdek and Klip-Lok profiles use their own saddle shapes, which is why buying the kit for your specific roof matters.
Sit the mesh flush against the roof sheet. A gap under the mesh at the roof line lets leaves in behind the guard, which is the worst of both worlds.
Valleys, corners and ridge caps
Valleys carry a concentrated sheet of water into a small section of gutter, so they need more attention than a straight run. Measure the valley width, cut mesh wide enough to cover it and to reach a proper fixing on both sides, then work from the top of the valley down.
Corners and mitres need clean notches rather than crushed or folded mesh. Around ridge caps, trim neatly and seal small remaining gaps rather than leaving an opening that pests will find.
If your roof has multiple valleys, a lot of hips, or a box gutter, this is the part where DIY jobs most often come unstuck.
Step 5: Test it with a hose
When every section is fixed, run a hose over the roof above the guard and watch what happens. Start with a moderate flow and build up.
Water should pass through the mesh into the gutter and out the downpipe. What you are looking for is overshoot at the eaves, leaks at joins, ponding, panels lifting, or water finding its way underneath the mesh. Check the valleys and corners hardest, because that is where the volume is.
Fix what the test shows you now, not after the first proper front comes through.
Bushfire mesh: what changes in Tasmania
If your place is in a designated bushfire-prone area, and a lot of Greater Hobart is, the mesh you choose is not just a leaf decision.
AS 3959:2018, the standard for construction of buildings in bushfire-prone areas, does not require you to fit gutter guard. But where a guard is fitted on a home rated BAL-12.5 or above, industry guidance based on the standard is consistent that it must be non-combustible metal, with a mesh aperture of 2mm or smaller so it works as an ember guard. Plastic and PVC mesh does not meet that bar in any bushfire-prone area.
Aluminium ember mesh is generally specified up to BAL-29, with stainless steel used for BAL-40 and Flame Zone. Your BAL rating comes from a site assessment, not a guess, and in Tasmania building work in bushfire hazard areas sits under the Director's Determination administered by Consumer, Building and Occupational Services. If you are unsure of your rating, check with your council or building surveyor before you buy mesh.
The Tasmania Fire Service is blunt about why this matters: keeping roofs and gutters clear of leaves and bark is core bushfire preparation, and metal gutter guards are recommended for homes in bushfire-prone areas. A gutter full of dry gum litter is fuel sitting at the most vulnerable point of the house.
The Hobart details competitors leave out
Nearly every gutter guard guide online is written for Sydney or Brisbane conditions. A few things work differently down here.
Hobart's rain is frequent rather than heavy. The Bureau of Meteorology's long-term record for Hobart (Ellerslie Road) shows an annual mean of 611mm falling across an average of 86.8 days of rain of 1mm or more, spread fairly evenly through the year rather than concentrated in a wet season. That pattern matters for two reasons: your gutters are rarely bone dry for long, and mesh that ponds even slightly will stay damp most of the year.
That constant damp is why shaded southern-facing roofs around the foothills grow moss and lichen, and why a roof that feels fine in February can be genuinely slippery in July. If you are planning a DIY install, do it in a dry stretch over summer or early autumn, not in the middle of winter.
The other local factor is what falls. Gums drop leaves, twigs and long ribbons of bark all year rather than in one autumn burst, and stringy bark behaves differently to a deciduous leaf. It drapes across mesh instead of blowing off, so even a well-fitted guard here needs the occasional look rather than being forgotten about.
When to call a professional
Be honest about the height and the roof before you commit.
DIY makes sense on a single-storey home with a low pitch, easy ladder footing on level ground, straight gutter runs and gutters in good condition. That covers a lot of houses.
Call someone in when you have a two-storey home, a steep or complex roof, a sloping or uneven site, multiple valleys or a box gutter, old brittle tiles, solar panels along the roof edge, or gutters that need repair first. Add to that anything where the mesh needs to meet a BAL rating, because a compliant product installed badly is not a compliant installation.
The safety point is not scaremongering. WorkSafe Tasmania is clear that falls are a major cause of serious injury in Tasmanian workplaces, including roof work, and portable ladders are one of the least stable ways to work at height. Those rules apply to workplaces rather than your own home, but the risk does not change based on who is holding the ladder. A gutter guard install means working at the roof edge, with both hands busy, for hours.
There is also the warranty angle. Lifting or drilling roofing to make a generic guard fit can affect roof warranty terms, and a professional install typically comes with a product and workmanship warranty of its own. It is worth weighing the cost of gutter guard against what your time and the risk are actually worth.
If you would rather have it measured, matched to your roof profile and fitted properly, our gutter guard installation service covers Greater Hobart and southern Tasmania, and we will tell you straight if guard is not the right answer for your place.
One honest caveat
Gutter guard reduces cleaning, it does not end it. Fine grit, pollen and shed bark still collect on top of the mesh, and around here they collect year-round. Plan on a check after big storms and a proper look over annually.
If you want the full picture on what guard does and does not solve before you spend anything, we have covered whether gutter guards actually work in more detail.
Get it done properly
Fitting gutter guard is not complicated work, but it is work done at the riskiest point on the house, and the difference between a good install and a poor one only shows up when the weather turns.
If you would like a look over your roof and an honest recommendation, get in touch with JK Gutter Cleaning Hobart for a no-obligation quote.
Frequently asked questions
Can I install gutter guard myself?
On a single-storey home with safe ladder access, straight runs and gutters in good condition, yes. Most DIY kits are designed for it. Two-storey homes, steep or complex roofs, box gutters and anything needing a bushfire rating are better handed to a professional.
Do gutter guards have to be screwed in?
Not always. Foam and brush inserts simply sit in the gutter, and some screen systems clip into the front lip. Aluminium mesh systems, which is what most Australian kits use, are screw-fixed with trims at the gutter and saddles or a tile tuck on the roof side. Screw-fixed systems hold up far better in wind.
Does the mesh go under the roof tiles?
On a tiled roof, yes. The back edge is tucked under a tile course above the gutter after relief cuts let the mesh follow the tile shape. Suppliers differ on whether that is the first or second row, so follow your kit's instructions. On metal roofs there is no tuck at all, the mesh is fixed down with saddles instead.
How long does it take to install gutter guard?
For a straightforward single-storey home, most of a day once you include the pre-clean, measuring and the hose test. Complex roofs, valleys and multi-storey jobs take considerably longer, and the cleaning stage often takes longer than people expect.
Do I still need to clean gutters after installing guard?
Yes, just far less often. Debris still settles on top of the mesh and fine material works into the openings over time, so the guard needs an occasional check to keep performing. It reduces maintenance rather than removing it.
Need your gutters sorted in Hobart?
Book a fast, obligation-free quote with your local team.